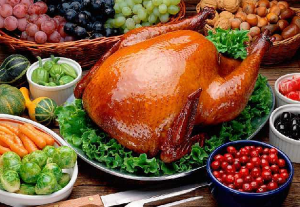
Though our family chooses to make a turkey each Thanksgiving, I know some families prefer to serve a ham or chicken. The recipe I am sharing today works great for a turkey, and I would definitely try it for a chicken as well. For the ham, I would bag it [2] like I plan to do with our turkey next week.
For those seeking a different baking option for the bird this year, try brining [3]. I received the below recipe from a friend, who could easily run his own restaurant. When I need help tweaking a recipe, I contact him for a solution. His recipes are always a huge hit.
With his permission to share, here is my all-time favorite recipe for that tender, moist, and delicious turkey:
Turkey Brine
Tuesday
If preparing the turkey on Thanksgiving Day, then begin defrosting the turkey on Tuesday or 2 days prior to meal time. Though there are a number of ways to defrost the turkey, I prefer to soak it.
1. Place turkey in a large pot, tub, or tote.
2. Add enough cold water to cover it.
3. Replace the water, if needed.
4. Check the turkey to see if it is soft.
5. Put in refrigerator if the turkey is fully defrosted.
Wednesday
1. Place the defrosted turkey in the large pot, tub, or tote.
2. Fill the container by gallons with enough warm to lukewarm water to cover the turkey. Paul uses a milk jug to add the water by gallons.
3. Add these ingredients:
½ cup pickling or kosher salt per gallon
½ cup brown sugar per gallon
5 bay leaves
2-3 Tablespoons of peppercorns
6 crushed cloves of garlic (With about 20 cloves per garlic, just break apart the whole and use 6 of them)
5-7 oranges, squeezed and tossed into the mixture
Other spices that can be added are basil, poultry seasoning, and thyme
4. Allow the brine to seep the flavored water into the bird for 12-24 hours prior to baking.
Thursday
Preparing the bird
1. Remove the turkey from the sticky, slippery brine mixture.
2. Drain the mixture from the bird.
3. Be sure the giblets and other guts have been removed.
4. Place bird on roasting pan.
5. Insert meat thermometer.
6. Preheat oven to desired temperature (I follow the recommendations attached to the turkey packaging.)
7. Measure out foil to “tent” your bird to prevent burning the outside, but do not “tent” it at the beginning of the baking time. I find getting the tent ready while the pan is cool saves so much time working around a hot turkey and hot pan.
Baking the bird
1. Put the turkey in the oven.
2. Check it between ½ and ¾ of the baking time.
3. Tent the bird when the outside is golden brown.
4. Carefully, remove the turkey when the meat thermometer indicates bird is thoroughly cooked.
5. Allow bird to cool before carving.
Though this option takes a little time each day for three days, the results are definitely worth it. In using time wisely and working around your other responsibilities, this option will give you a fantastic turkey to share with your friends and family. Just remember to start early in your preparations. Happy planning!
Question: When will you begin your Thanksgiving preparations? Please add your answer to the comments.
